

Scallops—sweet, tender, and melt-in-your-mouth good—are the crown jewel of any seafood dish. But cooking them at home? That’s where most folks panic. Don’t worry! Whether you’re aiming for a restaurant-quality dish or just craving a buttery sear on a quiet weeknight, this guide’s got your back.
In this article, we’ll walk you through everything you need to know about how to cook a scallops like a pro. From picking the right kind at the market to flipping them in sizzling butter, we’ll cover the tools, techniques, and timing needed to get that perfect golden crust every time.
Ready to transform your kitchen into a chef’s paradise? Let’s dive in!
Table of Contents
Introduction to Cooking Scallops
Why Scallops Deserve Special Attention
Scallops aren’t your everyday seafood. These ocean gems are naturally sweet, super delicate, and packed with flavor. But here’s the catch—they’re also unforgiving. One extra minute in the pan and they go from tender to tough faster than you can say overcooked.
Because they’re loaded with natural sugars, scallops caramelize beautifully when done right, creating that irresistible golden crust. But to unlock their full potential, you’ve gotta treat them with care—from drying them thoroughly to choosing the right pan.
When you learn how to cook a scallops the proper way, you’ll be amazed at just how easy—and quick—it can be. No need to wait for your next fancy dinner out.
Common Mistakes When Cooking Scallops
Most home cooks make a few big mistakes. They start with wet-packed scallops, toss them into a cold pan, or over-season before cooking. All of that leads to rubbery, pale scallops that stick to the pan and lack flavor.
Another culprit? Overcrowding the pan. That steams your scallops instead of searing them—yikes!
But don’t fret. We’ll cover all of this (and more), so your next scallop dinner is chef’s kiss perfect.
Types of Scallops and What to Buy
Sea Scallops vs. Bay Scallops: What’s the Difference?
Before you even step into the kitchen, knowing which scallops to buy is half the battle. Sea scallops and bay scallops may look similar, but they cook—and taste—quite differently.
Sea scallops are the big ones. They’re meatier, richer in flavor, and ideal for pan-searing. You’ll often see them labeled with numbers like “10/20,” which means there are 10 to 20 scallops per pound. The smaller the number, the bigger the scallop. That’s what you want when learning how to cook a scallops to perfection.
Bay scallops, on the other hand, are much smaller and typically used in pastas or seafood stews. Because of their size, they cook super fast and aren’t great for pan-searing. If your goal is that golden, buttery crust, stick to sea scallops every time.
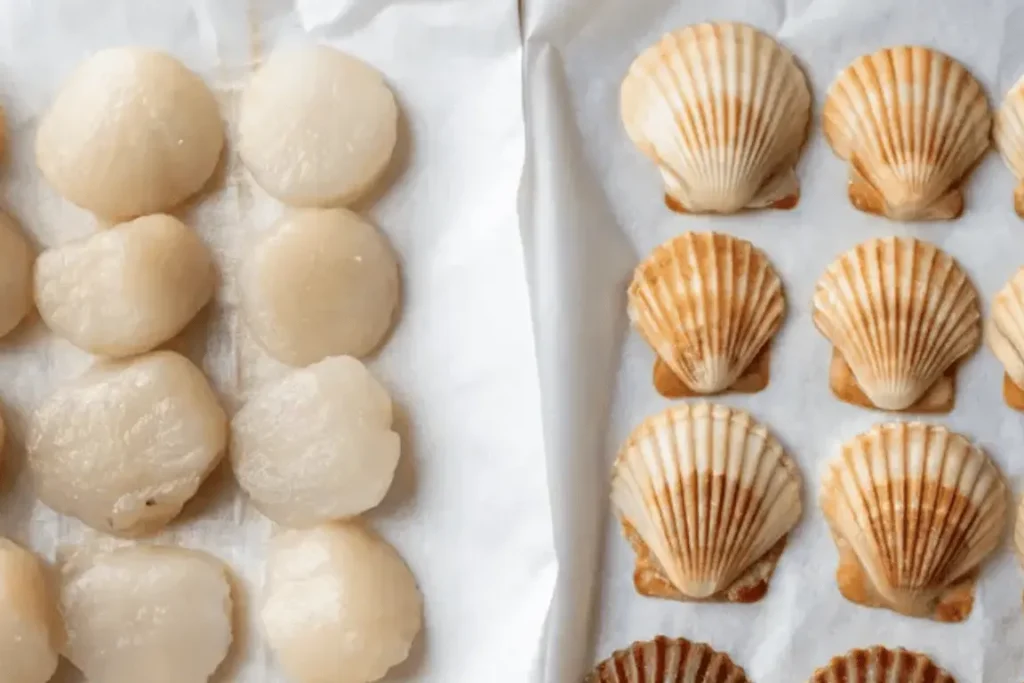
How to Choose Fresh, Dry-Packed Scallops
Not all scallops are created equal. When shopping, ask for dry-packed or dry scallops. These haven’t been soaked in chemicals, so they sear beautifully without releasing extra water.
Wet-packed scallops have been treated with sodium tripolyphosphate (STP), which makes them hold water. Sounds helpful? It’s not. Wet scallops steam instead of sear, and they taste kind of bland.
If you can find diver scallops, grab them—they’re hand-harvested and ultra-fresh. And always buy from a fishmonger you trust. Quality counts when you’re learning how to cook a scallops the right way.
Tools and Ingredients You’ll Need
Essential Equipment: Skillets, Tongs, and Thermometers
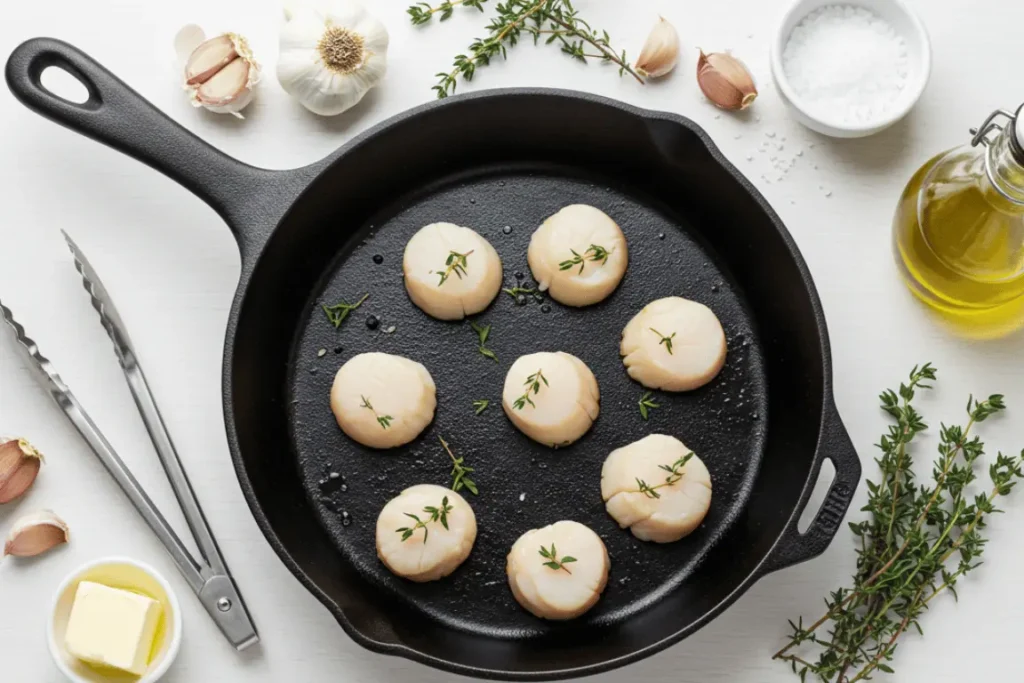
You don’t need fancy gadgets to master scallops, but a few key tools can make or break your dish. First, ditch the non-stick pan. For a proper sear, you need a heavy skillet—cast iron or stainless steel works best. These pans hold heat better and help develop that golden crust we’re after.
Tongs are your next best friend. They give you control while flipping those delicate beauties without tearing them. And while a thermometer isn’t required, it can help newbies avoid overcooking. Aim for an internal temp of around 125°F–130°F for medium doneness.
Choosing the Right Oils and Aromatics for Flavor
Oil matters more than you think. Choose one with a high smoke point like avocado, grapeseed, or canola oil. These let you sear over high heat without burning the oil—or the scallops.
After searing, butter is your flavor booster. Toss in a few sprigs of thyme, a smashed garlic clove, or even rosemary. As the butter foams, baste the scallops to finish them with richness and aroma.
To nail how to cook a scallops, you’ve gotta balance technique with the right tools. When your gear’s in place, you’re already halfway to a restaurant-worthy dish.
Prepping Scallops Like a Chef
Rinsing, Patting Dry, and Removing the Muscle
Scallop prep may seem basic, but don’t underestimate it—it’s where culinary magic starts. First things first, give those scallops a quick rinse under cold water. This washes away any lingering sand or shell bits. But don’t soak them! You don’t want them waterlogged.
Once rinsed, dry them like your dinner depends on it. Seriously—grab some paper towels and pat them bone dry. Any moisture left on the surface will prevent that golden sear. Water equals steam, and steam equals soggy scallops. Yikes.
Here’s another pro move: check the side of each scallop for a little rectangular muscle. It’s tough and chewy when cooked, so just peel it off. It’ll come off easily with your fingers—no knife needed.
Seasoning Scallops for Maximum Flavor and Browning
Seasoning scallops is all about timing. Salt draws out moisture, so don’t sprinkle too early. Instead, season with salt and pepper right before they hit the pan. This helps lock in the moisture and amps up that umami flavor.
Some folks like to get fancy with spices here—but honestly, when learning how to cook a scallops, keep it simple. Let the natural sweetness shine. You’ll add more flavor later with butter and aromatics.
Trust us—get the prep right, and the rest becomes a breeze.
How to Pan-Sear Scallops Step-by-Step
Preheating the Pan and Adding Oil at the Right Time
Now comes the main event! If you want to learn how to cook a scallops like a chef, this part’s your golden ticket.
First, heat your pan over medium-high heat for 2–3 minutes—dry. No oil yet. You want that pan hot but not smoking. A drop of water should sizzle on contact.
Once it’s hot, add about a tablespoon of neutral oil with a high smoke point—like avocado, canola, or grapeseed oil. Give it 30 seconds to heat up. You’ll know it’s ready when it shimmers slightly. That’s your cue.
Searing Technique: Timing, Flipping, and Basting With Butter
Place your scallops in the pan flat-side down—one by one, spacing them out so they don’t touch. Don’t crowd the pan! Otherwise, they’ll steam and lose that perfect crust.
Now, hands off! Let them sear undisturbed for 2 full minutes. That golden crust forms when they stay put. After 2 minutes, check the bottom. If they lift easily, they’re ready to flip.
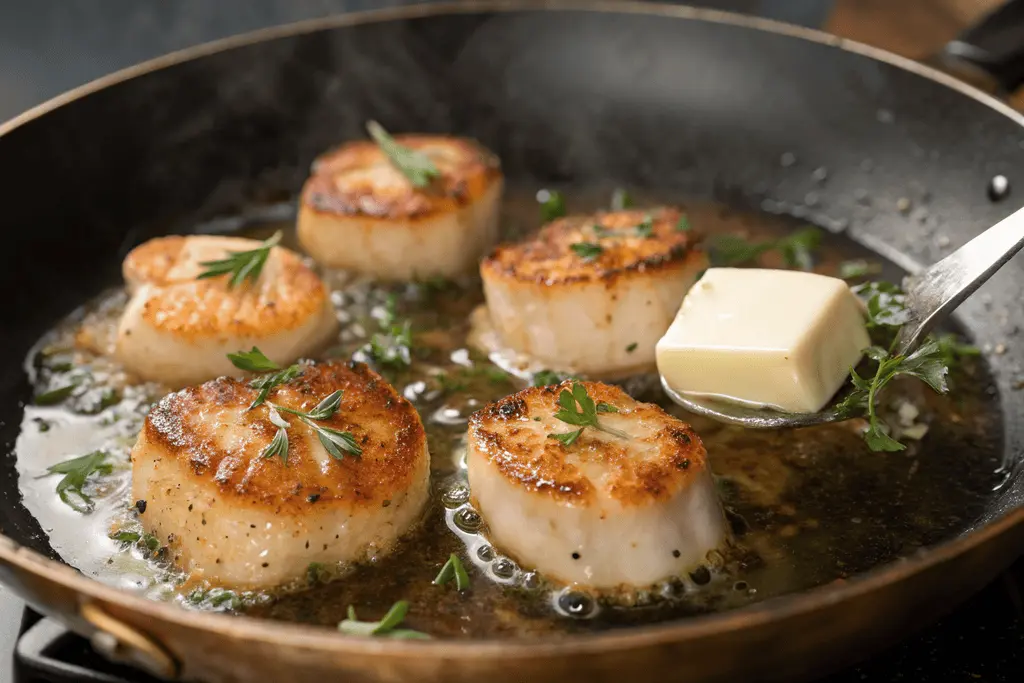
Flip each scallop gently. Then, lower the heat to medium and toss in a tablespoon of butter. Add smashed garlic, fresh thyme, or rosemary for a burst of aroma.
Tilt the pan and spoon the bubbling butter over each scallop. Baste for 30 seconds to 1 minute depending on size and doneness.
Remove from heat when the centers are still slightly translucent—they’ll keep cooking off the heat. You want that soft, melt-in-your-mouth finish—not rubber bullets.
For another way to enjoy sea scallops, check out our Sea Scallop Cakes Recipe Guide. It’s packed with bold flavor and makes a great side or main course.
Enhancing Flavor with Butter and Aromatics
What to Add: Garlic, Thyme, Lemon Zest
Once you’ve nailed the sear, it’s time to elevate the flavor. And trust us, this step makes all the difference when learning how to cook a scallops like a chef.
Right after flipping the scallops, add a tablespoon or two of butter to the pan. As it melts and begins to foam, toss in a couple of smashed garlic cloves, a few sprigs of thyme, and even a strip of lemon zest if you’ve got it on hand. These simple aromatics infuse the butter, creating a rich, golden sauce that clings to the scallops as you baste.
The scent? Absolutely mouthwatering.
Finishing Touches for a Chef-Level Presentation
Want to impress? Spoon that flavorful butter over the scallops as they finish cooking. It not only adds moisture but gives the scallops a glossy, professional look.
Right before plating, squeeze a touch of fresh lemon juice over the top for brightness. A light sprinkle of flaky sea salt can also boost that final bite.
With just a few extra touches, you turn good scallops into great scallops. And isn’t that what how to cook a scallops is all about—cooking with confidence and flavor?
Plating and Serving Scallops Like a Pro
Ideal Side Dishes: Risotto, Greens, and Purees
Great scallops deserve great company. So, what should you serve with them?
You can’t go wrong with a creamy risotto—especially one flavored with lemon or Parmesan. The richness balances the scallops’ delicate flavor. Or go green with sautéed spinach, asparagus, or garlicky broccolini. Veggies add contrast and color to the plate.
Purees are another pro move. Think silky cauliflower or sweet corn puree. They give the dish a smooth, restaurant-style vibe without much extra work.
When learning how to cook a scallops, don’t forget that sides matter, too. They elevate the whole experience from home-cooked to fine dining.
Garnishing and Sauce Options for Presentation
Presentation counts more than most folks think. For a polished plate, drizzle a bit of the pan butter around the scallops. Add a few microgreens or a sprig of parsley for color.
Want a little extra flair? A swirl of balsamic glaze or a citrusy vinaigrette can do wonders. But keep it simple—scallops should always be the star.
And there you have it! A beautifully balanced, chef-worthy dish made right in your own kitchen.
Storage, Reheating & Leftover Ideas
Best Ways to Store Cooked Scallops
So, you’ve mastered how to cook a scallops, but what about the leftovers? First things first—let the scallops cool completely. Then, store them in an airtight container and pop them in the fridge. They will remain fresh for two to three days.
Make sure to keep them away from foods that smell strongly. Scallops can absorb odors quickly, which can ruin their delicate flavor. If you’re not planning to eat them soon, skip the freezer. Freezing tends to mess with their soft texture.
How to Reheat Without Turning Them Rubbery
Scallops are finicky when reheated. They go rubbery fast, so use a gentle hand.
Try warming them in a skillet over low heat with a splash of butter or broth. Just a minute or two will do—don’t overdo it. The microwave? It works in a pinch, but keep it short—about 30 seconds.
Handled right, leftovers can still be delicious. Just another part of mastering how to cook a scallops at home.
Pro Tips from Professional Chefs
Lessons From Restaurant Kitchens
Professional chefs make cooking scallops look effortless—and with good reason. They’ve mastered the basics. So, what can we steal from the pros?
First, mise en place is key. That’s a fancy French term meaning “everything in its place.” Have your scallops dried, seasoned, and your tools ready before the heat even touches the pan. Timing is everything.
Second, chefs always let the pan do the work. A hot, heavy skillet gives scallops that deep golden crust without flipping or fussing. Less is more—don’t poke, prod, or move them around.
And finally? Confidence. Once you understand how to cook a scallops the right way, trust your instincts. Searing scallops is quick—so be ready, move with purpose, and serve immediately.
Troubleshooting Common Pan-Searing Issues
Still not getting the perfect sear? Double-check your scallops are truly dry. If they hiss but don’t brown, your pan may be too cool—or overcrowded.
And if they’re rubbery? You’ve likely gone a minute too long. Next time, pull them early. With scallops, it’s better to undercook and rest than overdo and regret.
Frequently Asked Questions
Q: What is the best method of cooking scallops?
The best method for cooking scallops is pan-searing in a hot skillet. This technique gives scallops a golden, caramelized crust while keeping the inside tender and juicy. It’s quick, flavorful, and easy to master at home—perfect for anyone learning how to cook a scallops with a chef’s touch.
Q: Should scallops be cooked in butter or oil?
Use both! Start with a high smoke point oil (like avocado or grapeseed) for the sear, then finish with butter to add rich flavor and help baste the scallops. This combo gives you the best of both worlds: crispy edges and a buttery, aromatic finish.
Q: Is it better to grill or pan fry scallops?
While grilling adds a nice smoky flavor, pan-frying (searing) is better for achieving a perfect crust and even cooking. A hot skillet lets you control heat more precisely, making it easier to avoid overcooking—especially important when perfecting how to cook a scallops at home.
Q: How long does it take to fully cook scallops?
Scallops cook very quickly—about 2 minutes per side over medium-high heat. You’ll know they’re done when the sides are opaque and the center is just slightly translucent. Overcooking can make them rubbery, so keep a close eye on the clock.
Want to dive deeper into seafood prep? For more delicious ideas, check out our Sea Scallop Cakes Recipe Guide.
Conclusion
Now that you’ve learned how to cook a scallops like a chef, you’re ready to turn your kitchen into a five-star seafood spot. From picking the right scallops to searing them to golden, buttery perfection, the steps are simple—but the results are unforgettable. By following these expert tips, you can avoid common pitfalls and serve scallops that are tender, flavorful, and beautifully caramelized every single time.
Whether you’re cooking for guests or just treating yourself, mastering how to cook a scallops is a game-changer. With a little prep, the right tools, and a touch of patience, you’ll be plating restaurant-worthy dishes that impress every time.
So grab that skillet, heat things up, and get cooking—you’ve got this!